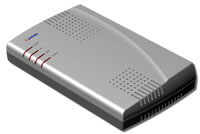
ITS Instruction manual

|
Contents
- 1 Introduction
- 2 Basic parameters and features of Slican ITS
- 3 Slican ITS elements
- 4 Using phone functions of PBX
- 4.1 Internal calls
- 4.2 Numbering - port numbers
- 4.3 External/outgoing calls
- 4.4 Outgoing via zero
- 4.5 Manual selection of line for establishing outgoing call.
- 4.6 Transferring calls
- 4.7 Call forwarding *72 - on / *73 - off
- 4.8 Call intercerption *978
- 4.9 Answering doorphone calls during another call
- 4.10 Conference calls, 3PTY calls.
- 5 Quick start
- 6 Resetting password
- 7 Retrieve default settings
- 8 VoIP function configuration - examples
- 9 Admin service codes
- 10 Firmware updating
- 11 Safety requirements while using ITS
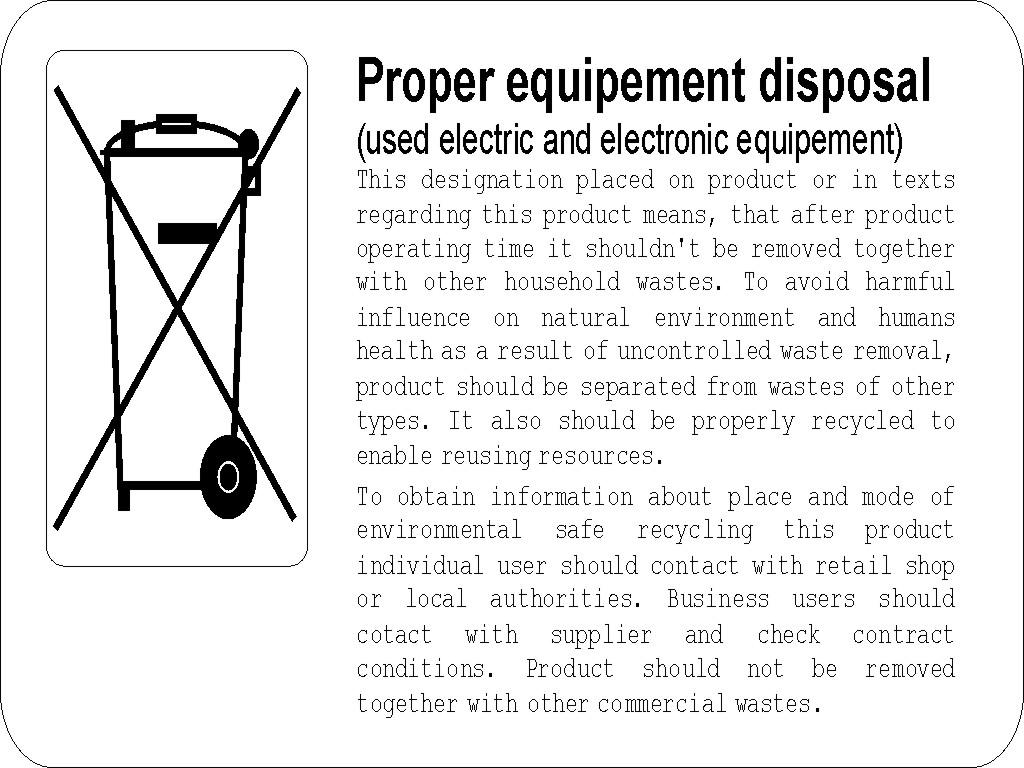
- 12 Certificate of conformity, proper device disposal
Introduction
Dear user - thank You for purchasing Slican ITS system.
Slican ITS cooperate with:
- analogue telephone devices: phones, faxes, modems. These devices can be both: tone (DTMF) or pulse dialing
- analogue external lines (POTS)
- VoIP[1] (SIP) devices or softphones
- VoIP (SIP) providers
System is perfectly suited for small companies, offices, single-family homes etc. Due to DISA[2] function, it is possible to automatic establishing incoming calls using DTMF[3] signal. VoIP functions make system flexible and easy in configuration.
Basic parameters and features of Slican ITS
Available models
| Model | |
|
|
FXS | |
| Slican ITS-0106 | |
|
|
|
|
| Slican ITS-0206 | |
|
|
|
|
| Slican ITS-0286 | |
|
|
|
|
Where:
- FXO - (Foreign eXchange Office) external analogue telefon line POTS[4] port - to this port line from upper exchange is connected.
- FXS - (Foreign eXchange Station) internal ab phone port - to this port phone/fax/modem etc. is connected.
- IPO - IP line port - this port can be logged into VoIP provider or another VoIP PBX.
- IPS - IP subscriber port - to this port SIP client can be logged in (gateway, SIP phone, SoftPhone type application).
Functionality
- remote managing via LAN network or Internet, using web browser installed on PC
- ClipFSC presentation receiving on POTS lines
- number presentation on internal lines
- VoIP-SIP calls maintenance
- possibility of configuration of restriction in establishing outgoing calls depending on subscriber
- cooperation with Slican BRV and SKD doorphones
- different ringtones for internal and incoming calls
- 3 standard DISA announcements with possibility of changing them
- upringing subscriber group
- call transfer
- call forwarding
- call history
Technical data
- power supply ~230V, 50Hz
- power consumption: 3W in standby mode; max.: 11W – if all phones ringing
- internal and external ports protected against overvoltage from telecommunication network
- analogue ports suitable for phones with pulse or tone (DTMF) dialing
- FXS analogue port range - up to 1000m
- LAN port (Ethernet 10/100 with auto MDI/MDIX) for maintenance of VoIP connection and programming
- fulfiling requirement of R&TTE directive
- casing dimensions 191x111x36 [mm].
Package content
| |
|
| Slican ITS PBX | |
| Power supply | |
| UTP cat.5 cable | |
| Fixing bolts | |
Slican ITS network environment
Slican ITS elements
ITS Terminals

| 1 . FXO external line no 41 |
| 2 . FXO external line no 42 (no in ITS-0106) |
| 1 . FXS phone 21 port |
| 2 . FXS phone 22 port |
| 3 . FXS phone 23 port |
| 4 . FXS phone 24 port |
| 5 . FXS phone 25 port |
| 6 . FXS phone 26 port |
| LAN – Ethernet terminal (auto MDI/MDIX) |
| RESET – PBX reset button |
| 12V – Power supply terminal |
LED Meaning
| LED | Status | Description |
|---|---|---|
| POWER | shines red | active mode day |
| flashes 2s/0,1s | no synchronization with time server - forced mode day | |
| shines blue | active mode night | |
| VoIP- details in www browser: pane: IP port status |
flashes | at least one VoIP trunk/account is configured, but at least one is not logged to provider |
| does not shine | normal status | |
| LINES | shines | any POTS-FXO trunk is busy |
| does not shine | all POTS-FXO trunks are free | |
| PHONES | shines | handset of any FXS phone is picked up |
| does not shine | handsets of all FXS phones are picked off |
PBX restart continues about 30 seconds (if PBX is set as a DHCP client) or about 90 seconds (if fixed IP address is set in PBX).
Using phone functions of PBX
In this chapter services realized by analogue phones equipped in pulse (DTMF) dialing.
Attention: some functions are unavailable for VoIP devices.
Internal calls
Należy wybrać numer wewnętrzny (por.: 4.2.1 Telefony/porty abonenckie lub 4.2.2 Grupy dzwonienia numerów wewnętrznych) i zatwierdzić wybór # (Hash).
Numbering - port numbers
Phones/subscriber ports
- 21..26 – numbers of internal phone ports (FXS)
- 31 – number of IP subscribers/VoIP phones/VoIP clients (concerns ITS-0106 and ITS-0206)
- 31..38 – numbers of IP subscribers/VoIP phones/VoIP clients (concerns ITS-0286)
Internal number upringing groups
- 61..63 – group numbers (accessible only from inside PBX, they cannot be dialed during DISA)
Lines/trunks/external ports
*41 – wyjście na linie miejskie POTS – FXO1 (dotyczy ITS-0106)
*41; *42 – wyjście na linie miejskie POTS – FXO1 i FXO2 (dotyczy ITS-0206 i ITS-0286)
*51..*52 – wyjście na linie VoIP – IPO (dotyczy ITS-0106 i ITS-0206)
*51..*56 – wyjście na linie VoIP – IPO (dotyczy ITS-0286)
Finishing number dialing #
Naciśnij # - aby zakończyć wybieranie numeru a właściwie przyśpieszyć wybranie danego numeru przez centralkę.
External/outgoing calls
External number should be dialed and confirmed by #. PBX automatically (according programmed settings) routes call via specified outgoing line. By default it is FXO1 or FXO2. It is also possible to "manual" outgoing line selection (4.2.3 Lines/trunks/external ports).
Following settings types, concerned with external number dialing, are available:
Outgoing via zero
Starting from firmware version 1.01.1080 global option, which interprets as outgoing all numbers with zero, was added. Settings this option is available in pane Global options: Reaching public newtork by 0.
Outgoing calls using outgoing rules included in tables (Outgoing calls 1 and Outgoing calls 2).
For specified subscribed appropriate rule (Outgoing calls 1 or Outgoing calls 2) is assigned.
Fixed assignment of specified outgoing line (IPO or FXO).
It means, that specified subscriber, independently on dialed number will be routed via assigned in configuration outgoing line.
Manual selection of line for establishing outgoing call.
Before dialing external number, number of outgoing line should be selected (see: 4.2.3 Lines/trunks/external ports)
Transferring calls
To transfer current call, you should press Flash[5] button and dial target number. Caller will hear a melody and call will be holded.
A If target number is free:
- you hang up the handset and target number start ringing – if it is transfer without offering. If you can hear target phone ringing and nobody answer this call, you can intercept this ringing back by selecting service code *978.
- you wait until somebody answer the call (to inform receiver about transferred call) – next you hang up the handset - it is transfer with offering. If nobody answer call on target phone, you can return to holded call by pressing 2 x flash.
B If target number is busy, you can:
- press flash button once more – you return to holded call,
- hang up the handset – holded call rings back.
Call forwarding *72 - on / *73 - off
- To activate call forwarding dial *72 target_number and press # - after service activation, you can hear confirmation Service is active.
- Code *73 should be selected to service deactivation.
Call intercerption *978
*978 - call interception (digits 78 ≡ PU PickUp) – if another connected to PBX phone is ringing you can „intrercept” this call by selecting this code.
Answering doorphone calls during another call
If any call is established and doorphone call is coming – subscriber hears short beep signal. In following situation it is possible:
- finish call and after hang up handset, doorphone start ringing.
- press flash button and dial extension number assigned to doorphone (phone call is holded); after next flash pressing subscriber returns to phone call.
Conference calls, 3PTY calls.
During call (outgoing, incoming, internal):
- press flash button,
- dial extension number of third person of conference, after establishing call:
- press flash button and next 3 – conference call is established.
Conference call is disconnected if at least two conference participants disconnect himself/herself.
Quick start
Należy podłączyć zasilanie do centrali – objawem procedury startowej będzie mruganie LED
na obudowie. Po starcie powinna świecić ciągle lub mrugać LED POWER.
Do dowolnego portu FXS należy podłączyć telefon, który będzie potrzebny do konfiguracji urządzenia.
Inside LAN network with DHCP service
Sprawdź adres IP: Podnieś słuchawkę telefonu i wybierz kod *947.
Urządzenie poda głosowo adres IP który otrzymało z DHCP.
Aby włączyć klienta DHCP (o ile poprzednio był wyłączony) należy wybrać *931. Urządzenie potwierdzi głosowo: „Usługa została przyjęta”.
Inside LAN network without DHCP service
Aby wyłączyć klienta DHCP: Podnieś słuchawkę telefonu i wybrarz kod *930. Urządzenie potwierdzi głosowo: „Usługa została przyjęta” i wykona restart z domyślnymi ustawieniami sieci:
IP:192.168.0.247MASKA:255.255.255.0BRAMA:192.168.0.1 DNS:194.204.159.1
Dla tej opcji działa również odsłuch adresu *947.
Configuration and compatible browsers
Urządzenie programuje się przez przeglądarkę internetową.
Aby połączyć się z centralą należy w pasku adresu przeglądarki internetowej wpisać adres otrzymany z urządzenia (zobacz: 5.1 W sieci LAN z serwerem DHCP lub 5.2 W sieci LAN bez usługi DHCP) Hasło: slican.
Zgodne przeglądarki internetowe to:
- FireFox 3.5.x oraz 3.0.x
- Internet Explorer 8.x
- Opera 10
- Google Chrome 3.x
Configuration window elements
Checking newest software version
Pierwszą czynnością po podłączeniu centralki powinno być sprawdzenie aktualnego oprogramowania (Firmware) urządzenia (Panel: Aktualizacja). Więcej w rozdziale Aktualizacja oprogramowania.
Resetting password
Wciśnij i przytrzymaj przez 2 sekundy przycisk reset. Kiedy wszystkie diody zaczną mrugać hasło zostanie zresetowane do fabrycznego (slican).
Retrieve default settings
- Wyjmij przewód zasilający z gniazda 12V
- Wciśnij (np. przy pomocy spinacza) i przytrzymaj przycisk reset (obok gniazda zasilania)
- Włóż przewód zasilający do gniazda 12V
- Odczekaj aż zaświecą się wszystkie diody i puść przycisk reset.
Tak zresetowana centrala wraca do wartości fabrycznych
VoIP function configuration - examples
Using VoIP provider
File:ITS op VoIP.png
Każde połączenie wychodzące można zrealizować za pomocą:
- FXO – linii analogowej podłączonej bezpośrednio do centralki
- IPO – skonfigurowanej linii usługi VoIP.
Z uwagi na fakt, iż zwykle usługi operatora VoIP są tańsze, można skierować wszystkie połączenia wychodzące w pierwszej kolejności przez takiego operatora, zaś w przypadku problemów (brak Internetu) ITS skieruje takie połączenia przez linie FXO (POTS).
Jednak w przypadku wysyłania faksów, modemów bądź innego rodzaju transmisji danych konieczne jest bezpośrednie skierowanie połączeń do sieci PSTN.
Kolejność wyjść ustawia się w panelu Ruch wychodzący i jest ona zależna od prefiksu.
IPO - VoIP line configuration
Panel: Translacje IP (IPO):
Aby skonfigurować/przypisać danego operatora należy:
- Wybrać linię VoIP.
- Wypełnić dane związane z danym kontem usługi VoIP zdefiniowanej u operatora.
Domyślny port to 5060, można go zmienić dla każdej z translacji z osobna.
Sposób wychodzenia określa się w Panelu: Ruch wychodzący.
Using VoIP subscriber
File:ITS IPS.png
Depending on Slican ITS model from 1 to 8 IPS (VoIP subscribers) can be logged.
According presented figure, VoIP subscriber can be can be any client in LAN network or outside of it - in Internet network.
VoIP subscribers extend PBX capacity and its range. Due to this feature company's extension numbers can exist everywhere, if Internet network is available, can use external ITS lines according assigned privileges.
IPS - IP subscriber configuration
Pane: IP Subscribers (IPS):
To configure IP subscriber account following should be done:
- Subscriber should be selected from list.
- Enable selected subscriber.
- Password should be assigned to VoIP subscriber. Password can be entered manually or generated by pressing adjacent button.
Attension! Extension number is always used as login.
- Additional parameters of IP subscriber are: codecs used by subscriber and subscriber comment.
If remote subscriber (outside LAN) login is required, port forwarding in router to ITS address in LAN. SIP port (signaling) for IP sunscribers: 5060 UDP by default (it can be changed in pane Global options). RTP ports: 8100-8200 UDP It is recommended to assign fixed address to PBX.
Admin service codes
- *981 - echo test – useful during PBX startup (only for internal calls)
- *982 - melody test – useful during PBX startup (only for internal calls)
- *947 – read PBX IP address (47 ≡ IP)
- *931 - switching on DHCP client in ITS (default settings)
- *930 - switching off DHCP client in ITS and assigning default IP parameters
Firmware updating
If ITS is connected to the Internet, it is recommended to upgrade ITS firmware (if newer version is available).
Pane Update->Find update->Select version->Update.
Attention! After firmware update execution all settings are removed, so before updating configuration printout should be done. It can be used in configuration restore after updating.
Safety requirements while using ITS
Security rules and proper using must be obligatory observed for assuring device proper operation.
Below basic rules concerning ITS are presented. Without fulfiling these rules any claim or notice presented by users cann't be accepted by manufacturer.
Rules presented here concerns installation, premises and requirements concerning power supply network.
Installation
- Device should be installed and startup by service with manufacturer authorization.
- All installation activities should be performed according assembly and safety rules.
- Due to heat abstraction it is recommended to install ITS in vertical position, so terminals should be accessible from the right side of device.
Work environment
- Due to durability and operating quality of electronic elements device should not be installed inside buildings or spaces with high humidity.
- Due to risk of flood of water, device should not be located near water reservoirs (pools, taps, etc.).
- Device should not be installed in premises with high dustiness or electromagnetic field intensity.
It is not recommended to install ITS in following permises:
- in premises with direct influence of solar light,
- in premises where vibration are very often or strong,
- near radio aerials.
All devices connected to ITS should have certificates of conformity with EU regulations.
Certificate of conformity, proper device disposal
 |
|||
| Manufacturer: SLICAN sp. z o.o. |
Type: IP PBX |
Models: SLICAN ITS-0106 |
|
| Device description: IP PBX ITS-0206; ITS-0286 with capacity of 8 ports and ITS-0106 with capacity of 7 ports, plus VoIP. Up to 6 analogue phones with tone or pulse dialing and VoIP phones can be connected to the PBX. Device can cooperate with PSTN network using annalogue trunkss with ASS signaling and with VoIP providers using LAN interface. |
|||
| Product fulfiles following EU Directive 99/5/WE R&TTE, it also fulfiles requirements of following harmonized standards: EN 60950-1:2007;EN 55022:1998 + A1:2000 + A2:2003;EN 55024:1998 + A1:2001 + A2:2003 |
|||
| Additional information: Current text of certificate of conformity can be downloaded from website www.slican.com
|
|||
 |
|||

- ↑ ang. Voice over IP – transmitting voice in IP networks
- ↑ ang. Direct Inward System Access – service enables to dial extension number without operator help.
- ↑ ang. Dual Tone Multi Frequency – method of pulse digits dialing
- ↑ ang. Plain Old Telephone Service – standard telephone line
- ↑ Depending on phone type name Flash, R or Recall is used