Difference between revisions of "PayMAN instruction manual"
(→Installation process) |
(→Locking phone after finishing call) |
||
| (3 intermediate revisions by the same user not shown) | |||
| Line 46: | Line 46: | ||
2. Start installation process by clicking ''Next.'' | 2. Start installation process by clicking ''Next.'' | ||
| − | <center>[[Image: | + | <center>[[Image:Payman_welcome.png]]</center> |
<center>''Fig. 2.2.: Installation hello screen''</center> | <center>''Fig. 2.2.: Installation hello screen''</center> | ||
| Line 88: | Line 88: | ||
| − | <center>[[Image: | + | <center>[[Image:Payman licensing.png]]</center> |
<center>''Fig. 3.1.: Software licencing''</center> | <center>''Fig. 3.1.: Software licencing''</center> | ||
| Line 122: | Line 122: | ||
After this settings, phone with specified extension number will be lock automaticaly after time defined in sheet '''''Global settings / Outgoing calls '''''in field '''''LckTi'''''. | After this settings, phone with specified extension number will be lock automaticaly after time defined in sheet '''''Global settings / Outgoing calls '''''in field '''''LckTi'''''. | ||
| − | <center>[[Image: | + | <center>[[Image:Payman lock time.png]]</center> |
<center>''Fig. 3.6.: Setting time to lock phone''</center> | <center>''Fig. 3.6.: Setting time to lock phone''</center> | ||
Latest revision as of 11:53, 11 February 2011
Contents
What is PayMAN software?
PayMAN application is provided for cost of call charging in CCT-1668 PABXes. PayMAN application can be used in hotels, pensions, hostels an in every place where often or current subscribers charging is required. Application enables to lock and unlock phones, charge call costs as post-paid or pre-paid. Current billing and charging report can be also prepared and printed from inside PayMAN application.
Using PayMAN application is possible from maximal four workstations (for one PABX). Followin communication interfaces can be used:
- LAN – up to four workstations
- Internet – single workstation
- USB – single workstation
- RS-232 – single workstation
- Modem (PABX build-in modem) – single workstation
Installation
Hardware requirement
- PC computer min. 200MHz,
- RAM memory 128 MB,
- fre space on hard drive HDD: 30 MB,
- Windows 98SE/NT/Me/2000/XP (for WinNT SP6 required),
- CD player or internet access.
Installation process
To instal Payman application following steps should be done:
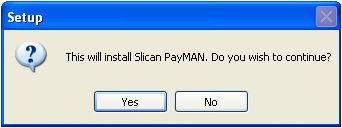
1. Launch setup application and agree by clicking Yes.
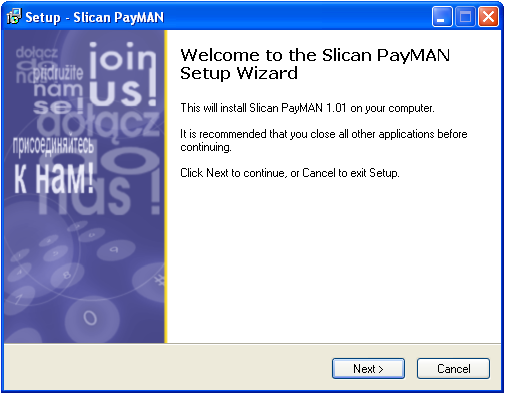
2. Start installation process by clicking Next.
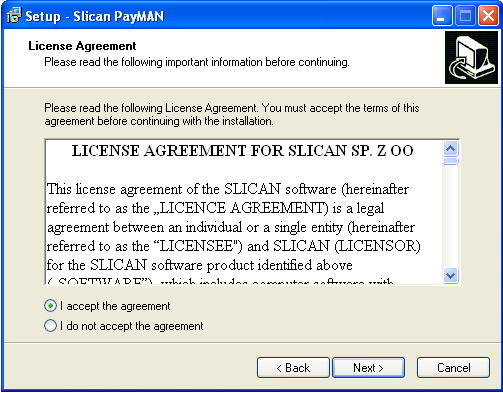
3. Accept licence conditionsby checking option Accept contract conditions and click Next.
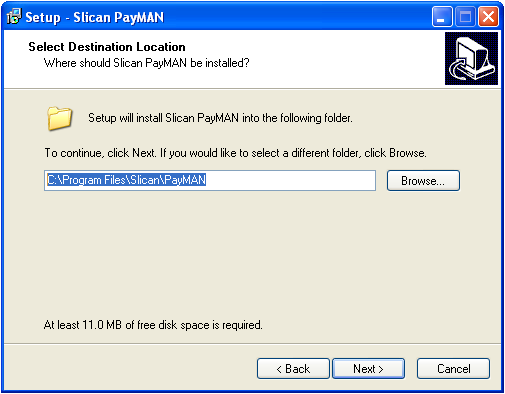
4. Accept default location for application (recommended) by clicking Next.
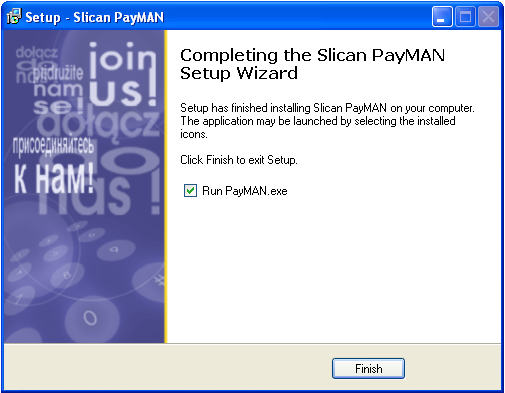
5. By clicking Finish You can launch PayMAN application (if field Launch PayMAN.exe is checked).

Directory structure in PayMAN application
After instalation, application files are located in following directory:
C:\Program Files\Slican\PayMAN\
Default directory fom databases of MAN system (MultiMAN, ConfigMAN, BilingMAN,PayMAN):
C:\Program Files\Slican\pabx data\
CCT-1668 configuration for PayMAN application cooperation
PABX configuration is performed using ConfigMAN application, provided to CCT-1668 managing. Configuration steps required for PayMAN application are as follows:
- entering licence code for PayMAN application,
- assigning users privileges to using PayMAN application,
- defining which ports will be serviced by PayMAN application,
- defining cost limit type,
- set to extension numbers if and after what time since finishing call phones shoulb be locked.
Licences for PayMAN software
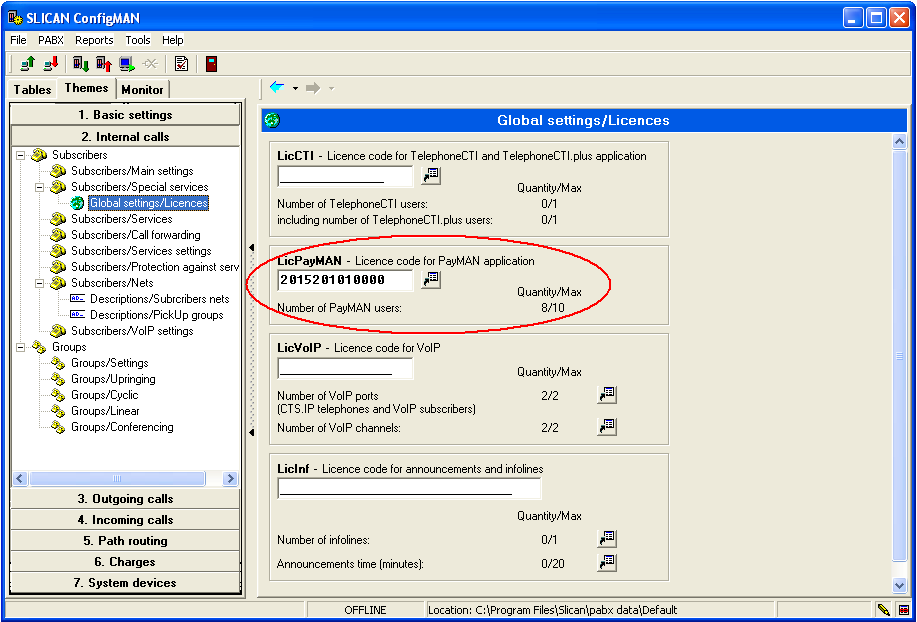
PayMAN application is licenced. Licence defines number of PABX ports (subscribers) serviced by PayMAN application. Licence code should be entered in sheet arkuszu Global settings / Licences in field LicPayMAN. By default – for testing purposes – one licence (for one subscriber port) is granted.
Privileges set in CCT-1668 to using PayMAN application
Creating users of PayMAN application is realized by adding rows in sheet Global settings / PABX access codes, in ConfigMAN application. Privileges are assigned to users by checking Pay field, which enables to PABX cooperation with PayMAN application.

Next, value of access code for every application users should be defined (four digits). Access code can be set in field Code by pressing button Change code.
Assigning PayMAN using privileges to subscriber ports in CCT-1668
In ConfigMAN application, in sheet Subscribers / Special services You can define, which subscribers will be serviced by PayMAN application. Privileges to service by PayMAN application can be assigned to subbscribers (subscriber ports) freely, in scope of acquired licence. ConfigMAN doesn't enable to assign privileges to more subscribers then specified in licence. Scope of licence can be extended in any time.
Naming rule of PayMAN licence: CCT.LIC-XX.PayMAN - PayMAN application licence for XX subscriber ports

Granting costs limit
Every PABX subscriber call cost limits can be granted. Limit type can be defined into ConfigMAN application or directly while using PayMAN application.

Locking phone after finishing call
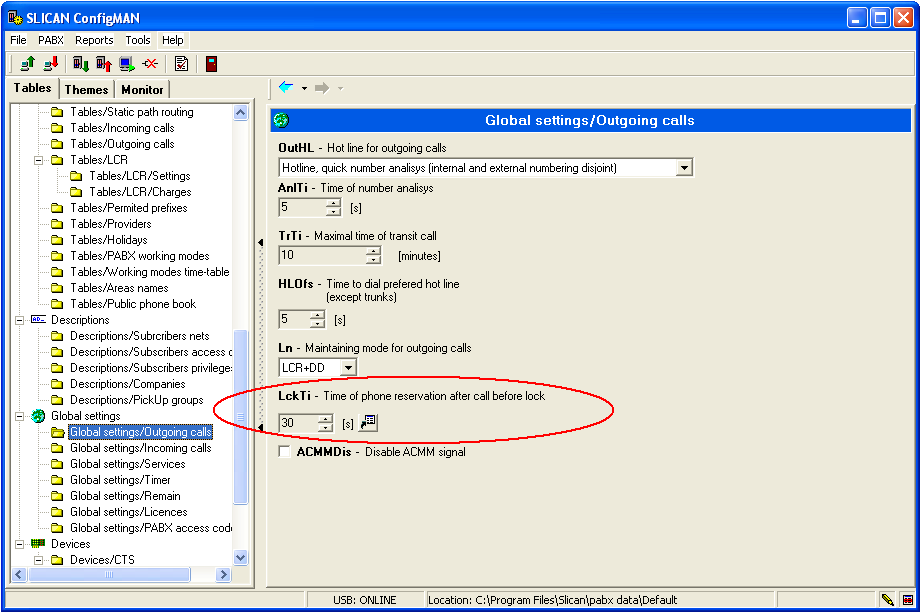
For every subscriber port You can separately define if subscriber phone should be locked after specified time since finishing call. You can also specify this time. To do this, You must connect with PABX using ConfigMAN and in sheet Subscriber / Outgoing calls in field PhLck select option Lock after tiome period.

After this settings, phone with specified extension number will be lock automaticaly after time defined in sheet Global settings / Outgoing calls in field LckTi.
Using application
PABX connection configuration
Connection settings can be done after selecting menu option PABX -> Connection configuration. PayMAN application supports the same connection modes as ConfigMAN.
1. Connecting via LAN network To conect to PABX via local area network LAN field should be checked and PABX IP address entered. If You check option Search server in local network PABX will be find automatically.

By this connection mode up to four PayMAN workstations can be connected.
2. Connecting via Internet
PayMAN application users can connect to PABX via Internet. For this purpose Gatekeeper mechanism is implemented. Gatekeeper authorise access to PABX. All Internet connections to PABX are coded. To PABX configuration port 5528 is used.
To establish connection to PABX via Internet, Service ID should be entered (the same as used to log in on web page www.slican.pl in tab ServNET) and Password ( the same as used to log in on web page www.slican.pl in tab ServNET) as well as PABX type and serial number.

By this connection mode only one PayMAN workstation can be connected.
3. Connecting via USB
Connection configuration via USB is limited to USB option selection.

By this connection mode only one PayMAN workstation can be connected.
4. Connecting via RS-232
To connect to PABX via RS-232, option Serial port should be selected and enter conection port number. Transmission speed of fixed by PABX controller.

To connecting computer and PABX, cable RS-232 – NullModem with two female connectors. By this connection mode only one PayMAN workstation can be connected.
5. Connecting via modem
Modem connection can be realized as incoming call or as internal call. To enable modem transmission, option Modem should be selected in PayMAN application and selection of modem which will be used (if more than one modem is instaled in system).

6. If You want to connect to PABX via modem, after pressing button Connect in main window of PayMAN application, system ask about number to dial and mode of establishing connection: directly or while DISA anouncement. If You are going to dial modem number while DISA announcement, time to dial modem number can be defined.

If none extension number is assigned to modem, connection to this modem can be alwayst established by selecting service #989 during anouncement or while direct connection to internal line (subscriber line).
By this connection mode only one PayMAN workstation can be connected.
Due to delay dialing, digits can be separated by „ , ” sign. This sign „ , ” is equal to 1 sec time. To extend this time more delay signs can be entered.
Maximal number of simultaneusly connected workstations with PayMAN applications is equal to 4 (independently from used connection interfaces).
Launching application
After launching PayMAN application window with ask about entering access code (granted to every application user).

During first application launching Cancel button should be selected and connfiguration parameters defined.

How to configure connection parameters can be found in previous chapter of this manual.
Next, using Toolbar, You should press Connect button. Whilev preparing to work application synchonize with PABX database, by first launching it can take a long time (depending on PABX database size).

After connecting to PABX and synchronizing, PayMAN application is ready to work.
Synchronization process is performed after every PABX connection, however only first synchronization takes a long time because whole call buffer should be downloaded from PABX. By next connections synchronization is much more quicker because only new information are added to application database.
Application structure

1. Application menu bar
Reports menu – contains options concerning charging for specified period;
PABX menu – contains options which enable to connect and disconnect with PABX and to define connection parameters;
Tools menu – contains main settings of PayMAN application;
Help menu – assure information about service availability and this manual.
2. Tool bar – contains icons of often used functions
3. Subscriber list – contains all most important information about current subscriber status. First three columns of subscriber list define following information:
- if for specified subscriber there are new, not viewed calls
- if phone is locked or unlocked
- if subscriber is checked-in (currently during charging period) or checked-out,
Next subscriber list contains following columns:
ExtNo. – extension number assigned to subscriber
Comment – subscriber name defined in PABX configuration
Balance – contains current value of subscriber call costs. Initial value of balance is defined during subscriber check-in.Next, this value is presented as negative and together with subcriber call costs increase in direction of 0, to exhaust assigned while check-in balance. When balance is exhaused further dialing possibility depends on settings in Limit field. If Limit is set to 0 value, subscriber can not be able to establish calls. If Limit is greater than 0 tha value in field Balance will be increase up to Limit value. Balance settings can be used to pre-paid charging.
Limit – if in this field value No limit value is entered, subscriber can establish calls without any limitations. If any numerical value is entered (ex. 100), subscriber can establish calls until total cost of calls will will be less than this value. Limit settings can be used to post-paid charging or without any charging.
Conn. No – total number calls dialed by subscribet from check-in
Conn. Time – total time of calls from check-in.
4. Info about subscriber status – additionally, beside information in subscriber list, application user obtain information about automatic phone locking and assigned to subscriber limit type.
5. Managing subscriber charging

- No limit – subscriber can establish calls without limitation
- No auto recharging – after selecting this limit type, automatic recharging is not performed, Balance value depends only on settings during check-in and established calls.
- Everyday recharging – enables to define amount which is added everyday to Balance field value.
- Every monday recharging – enables to define amount which is added every monday to Balance field value.
- Every first day of month recharging – enables to define amount which is added every first day of month to Balance field value.
- Limit set in application – selecting this options means, that automatic Balance recharging is not performed, recharging value depends only on settings definr\ed during check-in.
Details – clicking this button You can preview all information about calls dialed by specified subscriber from check-in.
Unlock – after clicking this button phone with selected extension number is unlocked
Lock – after clicking this button phone with selected extension number is locked
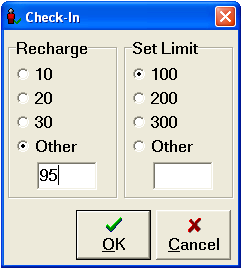
Check-in – after clicking this button charging period starts. During check-in You can set initial Balance (Recharging area) and Limit value. Depending PayMAN settings, subscriber phone can be automaticaly unlocked after check-in action.
Check-out – after clicking this button charging period finishes. It is followed by creating report about established calls, with possibility of print this report. Depending PayMAN settings, subscriber phone can be automaticaly locked after check-out action.
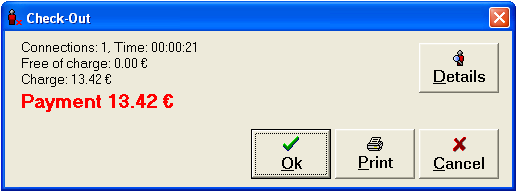
By pressing Details button You can obtain detailed list of calls dialed by subscriber from check-in, such list can be seen on following figure.
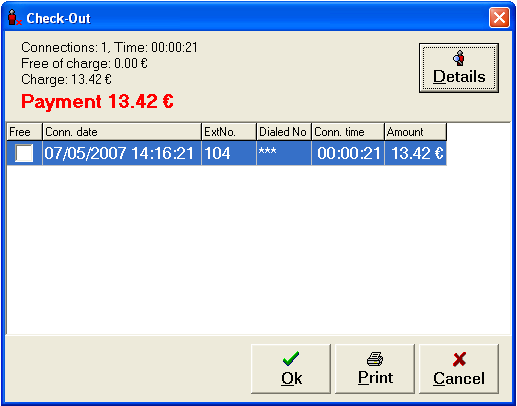
Viewing detailed list of calls before subscriber charging, user can mark specified calls as free of charge, by means of checkbox located in first column. Such calls, however are included in report. Next to print report, You should press Print button, to check-out subscriber You should press OK.
Setup in PayMAN application
PayMAN application setup can be done by selecting Tools -> Application setup option from main menu. Setup option are divided into five groups:
1. Settings
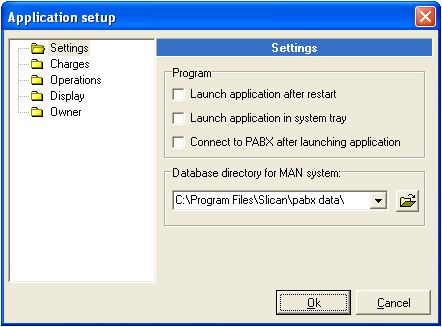
By defining this group of settings, You can define if application should launch after system restart, if after launching application should connect to PABX and etc. Default storing location for database can be also changed.
2. Charges
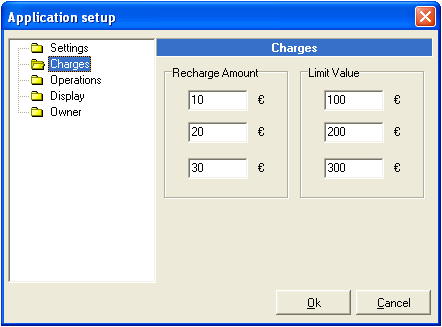
Charges settings enable to define three values of recharging and limit, most frequently assigned to subscriber. These values will be use as default values, without neccessity of manual entering while assigning to subscriber (manual entering another value of recharging and limit is always possible).
3. Operations
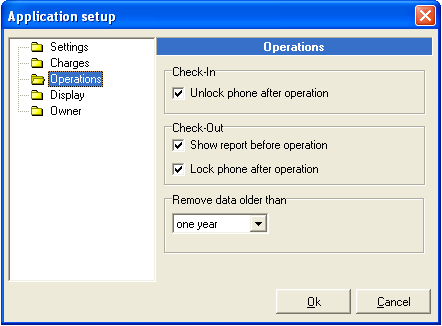
- Unlock phone after operation – if You select this option, every time after subscriber check-in (after start charging period), phone assigned to this subscriber is unlocked.
- Show report before operation – if You select this option, every time during check-out action (finishing charging period) charging report with settlement of established calls and their costs is created – user can print this report.
- Lock phone after operation – if You select this option, every time after check-out action, subscriber phone will be locked.
- Remove data older than – all information about calls older than quarter, half a year, year, two years (depending on selection) are deleted. Exception is saving data for subscribers who are checked-in for longer period .
4. Display
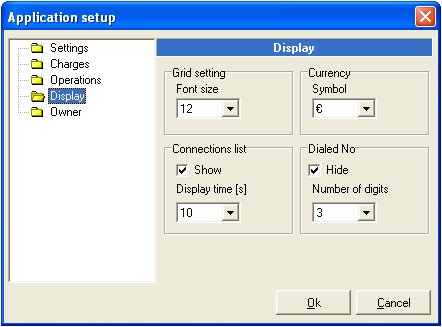
- Grid setting – this settings enables to change font size for Subscriber List, PayMAN main window and in any other place where data are presented in tables,
- Currency – this settings enables to choose currency symbol to present with call costs,
- Connections list – this settings enables to define if and how long pop-up window with information about finished calls will be displayed on screen,
- Dialed No – defines dialed number presentation mode. In reports dialed number can be presented as whole number or up to 9 last digits can be hidden.
5. Owner
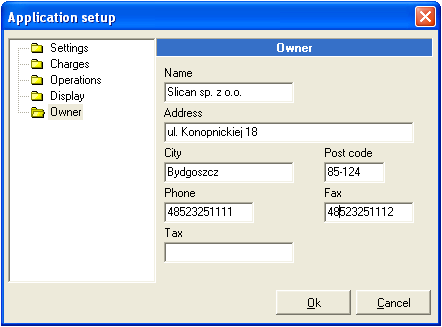
This window enables to define data of copany or person who is the owner PABX and provide call possibilities. These data will be displayed on reports created by application.
Subscriber list filtering
Application user can limit number of ports displayed on Subscribers List, only ports interested for user are displayed on this list. For example: department chief charges only persons working in this department.
To limit displayed ports on subscriber list option Tools -> Subscriber list shoud be selected from main menu.
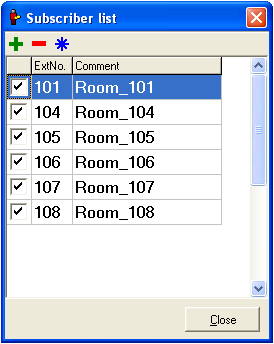
On displayed list of all subscribers, only charged ports should be checked. Checked ports will be displayed on Subscriber List.
User reports
In every time user can display and print settlement of actions performed in PayMAN application, especialy:
- Users Pay-off report
- Free connection report
Users Pay-off report
Report window can be show on screen using shortut Alt+P or using option: Reports -> Pay-off from main menu.

Report can be displayed for:
- current day
- previous day
- current month
- previous month
- whole period available in application
Report can be in detailed form, as on figure 5.1 or limited to charges for each subscriber, as it is shown on figure 5.2. Report form depends on Details checkbox status – this checkbox can be found above report.

Both simple and detailed report can be printed. To do this You should select Print button.
Free connections report
Report of free connections can be displayed on screen by means of Alt+F shortcut or selecting options Reports -> Free connections from main menu.

Report can be displayed for:
- current day
- previous day
- current month
- previous month
- whole period available in application
Report can be also printed.
PayMAN software application
Inside many possible PayMAN software applications, special attention can be paid on three of their, which were especialy observed during PayMAN developing. In following chapters the are shortly described.
Hotel room service
Hotels, pensions and hostels are most obvious places to using PayMAN application, here PABX subscribers (users) periodical charging is very often. Due to PayMAN application You can start charging subscriber calls together with check-in. You can do it by PayMAN, without neccessity of using sophisticated hotel software. Hotel guest can be charged in few modes: pre-paid, post-paid, with assigned limit for calls or withoutout such limit. If limit for calls is assigned to hotel guest, You can in any time increase this limit. During check-out clerk can print settlement of established calls and their costs. Based on this report, bill can be issued.
Public phone service
In every places, where You want to make available public phone and charge for calls established from this phone, it is possible to do it with help of PayMAN application. Such phone is still locked, so nobody can establish calls. When someone wants establish call, person who uses PayMAN application can unlock phone and start charging. After finishing call phone will be automatically locked and PayMAN user can present printed bill for established call.
Staff service
PayMAN application can be also used to control costs of calls in company. Du to possibility of filtering calls every user (chief of department) can limit displaying Subscriber List to several persons. To specified persons limits for calls can be assigned. To automate work and save monye, assigned limits can be automatically recharged in day, week or month periods. Symilarly like in previous chapret also in this situation creating call costs are possible.
List of shortcuts used in application
Menu shortcuts
- Pay-off Alt+P
- Free connections Alt+F
- Printer setting Ctrl+T
- Quit Alt+F4
- Connect F9
- Disconect Ctrl+BkSp
- Connection configuration Ctrl+F5
- Access code Ctrl+F9
- Application setup Ctrl+S
- Subscriber list Ctrl+F
- Help F1
Action shortcuts
- Unlock Ctrl+U
- Lock Ctrl+L
- Check-in Ctrl+I
- Check-out Ctrl+O
- Limit type Ctrl+M
- Details EnterHistory Ctrl+H
- Select all Ctrl+A
- Print Ctrl+P