PhoneCTI voip
Contents
Introduction
Slican's PhoneCTI.voip application contains all features off standard app version and allows for integartion phone with PC used by PBX subscriber. It is a PC application, designed for Windows operating system, which combines the ability to control the phone, access to PBX phonebook, subscribers call history, recorded calls, chat, SMS messages and other subscribers statuses, and addiditionally conversations with in-built SIP client. Application is not standard SIP softphone, and cannot be logged to ohter PBXes. To log the app and make calls with it, access to PC and PBX in the same network is required.
Application can be paired with all kind of phones connected to PBX: CTS system phones, analog, and VoIP phones. In the newest version, PhoneCTI can work as standalone voice communicator, installed on PC. Additional features relate mainly to analog phones users, becuse it grants them priviledges not accessible via desk phone.
PhoneCTI.voip allows user to access phonebooks stored in PBX memmory. They can be viewed and edited via system phone and PhoneCTI users. Applied changes in phonebook will be visible instantly on other users applications/phones. PhoneCTI.voip gives the possibility to use internal chat. All CTI users connnected to the same or linked PBX, can communicate with each other with chat feature.
Another big feature is integration of the PBX phonebook with users PC and PhoneCTI application. PhoneCTI.voip application uses phonebooks stored in PBX memmory, wich can edit it both from application and CTS system phone. Entered change is instantly visible. Chat feature can be attractive for companies that do not allow, due to security measures, to use third-party communicator applications.
Minimal requirements
To install Slican PhoneCTI.voip application, following minimal requirements are necessarily:
- Computer should be powered with clock >800 MHz
- Computer RAM memory should be 1GB minimum
- Computer graphic card should be compatible with DirectX 9
- Operating system - WindowsXP SP2 or later
- Microsoft .NET Framework 4.0 or later installed on computer
- Web browser Internet Explorer 7 or later installed on computer
Installing application on computer which doesn't fulfill mentioned minimal requirements is possible but it will work slowly or not all functions will be active.
|
Installation
Slican PhoneCTI.voip application is licensed and using it requires purchase of appropriate license code. Purchased license code is entered during PBX configuration and decides about number of workstations with Slican PhoneCTI.voip application. Application licensing has no influence on its installation. Application setup can be downloaded from Slican ServNET zone and application install on the computer by entering appropriate data, necessarily to log in, in tap Settings - Connection.
|
Second installation stage (not obliged) rely on uploading to PBX properly prepared file with PhoneCTI.voip application update. It can be done by PBX admin. This activity, if done, enables automatic updating PhoneCTI application on workstations. Updating is described in chapter Application updating.
Application launch
PhoneCTI.voip application can be launched as any other Windows application. In application settings you can activate functionality of automatic launching application after operating system start. Diuring launching application it log into PBX (according settings defined in tap Settings - Connection). After successful login, application synchonizes application data with appropriate data in PBX.
Application updating
Application updating id executed automatically and user has no influence on its proceedings. Similarly as for PBX, VoIP card or REC card firmware updating, updating of Slican PhoneCTI.voip application updating is executed by PBX admin. Every time during PhoneCTI application launching version check (uploaded to PBX and installed on user PC) is carry out. If these version numbers are different, application stored in PBX is automatically downloaded and installed on user PC, next new installed application is launched and log into PBX. Depending on version number updating can be upgrading or downgrading.
Application structure
Designation rules
PhoneCTI.voip application is very simple and intuitive, with help of appropriate icons status of phones visible in application windows. These icons invite user to execute specific action.
Icons and symbols
For PBX extension numbers, symbol of phone status and linked PhoneCTI.voip application consits of two icons, first of them represents phone status, while second represents application status.
Table 1 icons represent phone status.
Table 2 icons represent application and chat status. Statuses can be changed manually buy application user..
| Application status | |
|---|---|
| Ikona | Icon description |
| app is running and logged to a number | |
| Be Right Back status is active | |
| Do Not Disturb status is active | |
| app is not running or not looged to a number | |
Symbols location and meaning
Symbols presented in tables can be visible in the main application window. After log in appropriate symbol is visible in top part of PhoneCTI.voip application window, as it is presented on following figure:
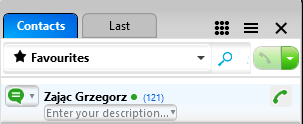
Quantity and type of displayed contacts, depends on set filter. From expandable list we can choose: Favourites, Recently used, All contacts and Internal Numbers, Public or Private contacts. An example of the defined Internal number:
In addition, pay attention to the following elements:
- Below the defined in PBX subscriber comment, user can enter a optional description for its own number. If empty, the field will display "Enter your description...".
- If contact has own number, it will be show on the right side of comment.
- If number is listed in public phonebook, but it is restricted, user will se only comment of contact.
- Icon on the left side of public contact, lets user send SMS message. Feature is determined by user configuration: priviledges, outgoing trafiic routing, etc.
Settings
|
After choosing Settings, we will see a new window with several tabs, that are used to configure many application options. Most of them will be described below.
Settings - Connection
After new widow have appeared or we choose Connection tab, we will see:
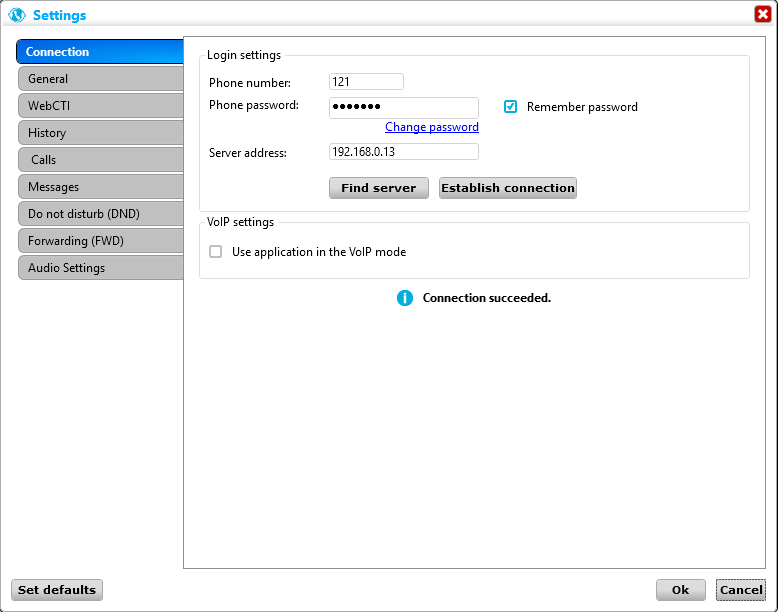
Login settings Visible fields are used for typing necessary data for connecting application with PBX. First field should contain PBX internal number of PhoneCTI.voip user. Next field is a password set by system administrator. After first connection with PBX, user will be asked for changing the password for only user-known one. Password should contain 4-16 characters, excluding ; and ~. Tha password can be also changed manually, by selecting the Change password link. Server address field is used for typing PBX address. Proper filling all above fields will result in connecting to PBX, and start of data synchronization. After succesfull operation user will be promped with Connection succesfull text. If any data will be filled not properly, user will see text Login failed. Change password link will automatically change to Forgot password and forward after clicking to WebCTI site, where we can send password reset link to specified e-mail address.
VoIP settings Checking the Use application in VoIP mode will first start a test of VoIP connection between application and PBX. In LAN, there is no need for additional settings to connect to PBX. If user is connecting to the PBX from behind a NAT, specified ports needs to be forwarded to PBX IP address:
- TCP 5529 - to PBX controller card IP address
- UDP 5060 - to PBX controller card IP address, or VoIP card (MAC-6400 PBX)
- UDP 8100-8300 - to PBX controller card IP address for PBXes without additional VoIP card
- UDP 8100-8300 - to additional VoIP card in MAC, IPL, IPM or IPU PBX
Positive test result:
In case of full lack of network connection, user will see:

In case of VoIP problems:

|
Settings - General
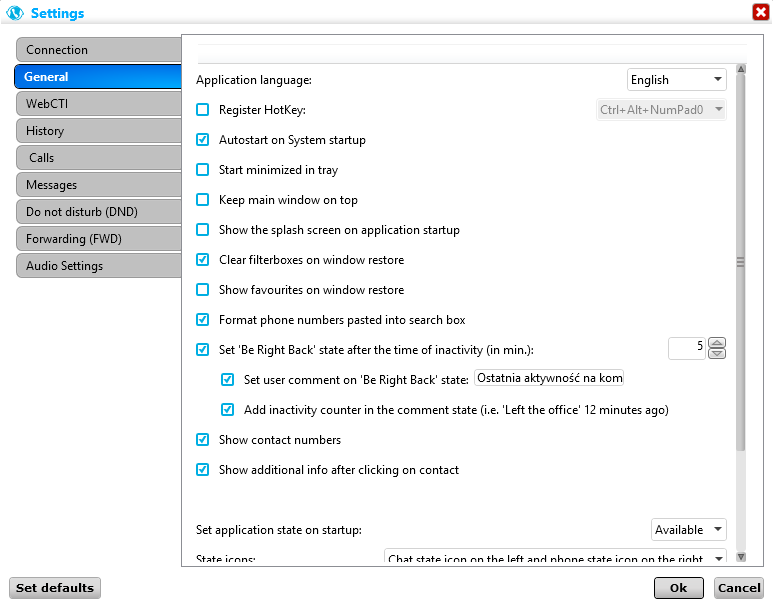
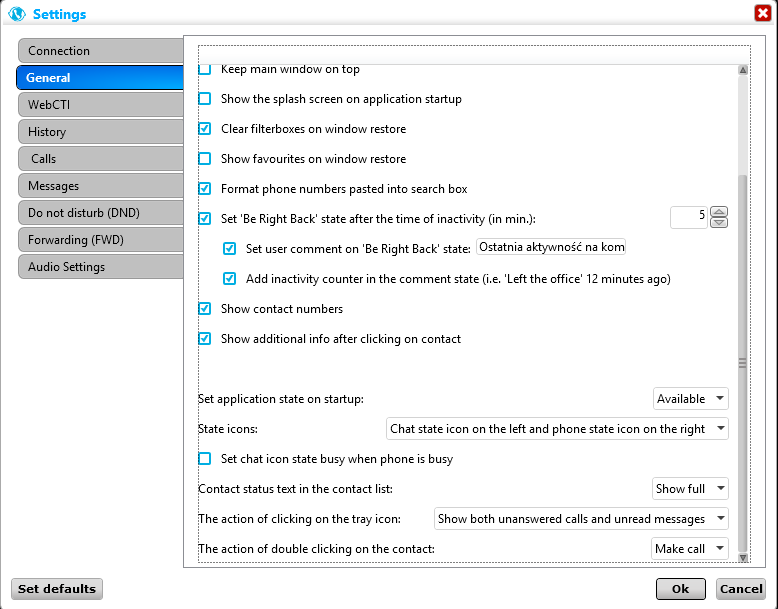
This widow allows to set multiple application parameters. The define autostart process and visibility of specified data.
Available settings:
- Application language - choosing displayed text language: English, Polish, Deutsh
- Register hotkey - keyboard shortcut which will pop up the main application window from tray
- Start minimized in tray - method option for application
- Keep main window on top - other applications that are running will not cover PhoneCTI window
- Show the splash screen on application startup - version information turning on/off
- Clear filterboxes on window restore - after bringing application from tray, search box will be cleared
- Show favourites on window restore - after bringing application from tray, favourites contacts will be displayed
- Format phone numbers pasted into search box - eliminates redundant spaces, plus signs and brackets in pasted number
- Set 'Be Right Back' state after time of inactivity (in min.) - automatic BRB state time
- Set user comment on 'Be Right Back' state - users own text informing about Be Right Back status
- Add inactivity counter in the comment state - adding Be Right Back status time counter
- Show contact numbers - Last tab will present both contact name and number
- Show additional info after clicking on contact - displaying additional informations about contact
- Set application state on startup - choosing user state after application startup
- State icons - list of layout settings of phone and chat icons
- Set chat icon state busy when phone is busy - option will set both chat and phone icons status to busy, while user is during a call
- Contact status text in the contact list - method of displaying users status text
- The action of clicking on the tray icon - choosing action from expandable setting list
- The action of double clicking on the contact - choosing action from expandable setting list
Settings - WebCTI
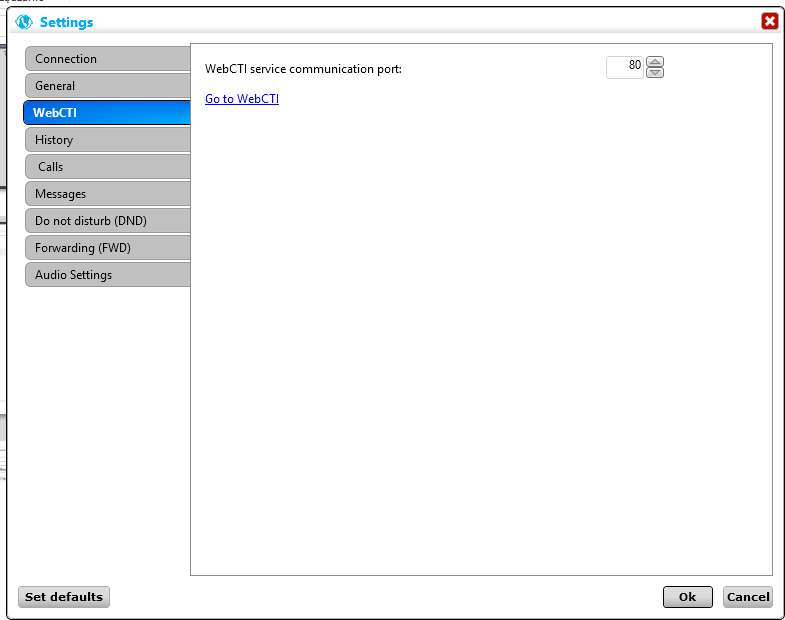
In this window we configure connection port for WebCTI service, used for e.g.: change phone settings, make phone calls, history review, listening to own recorded calls. Setting used mostly for external network connection to WebCTI.
Settings - History
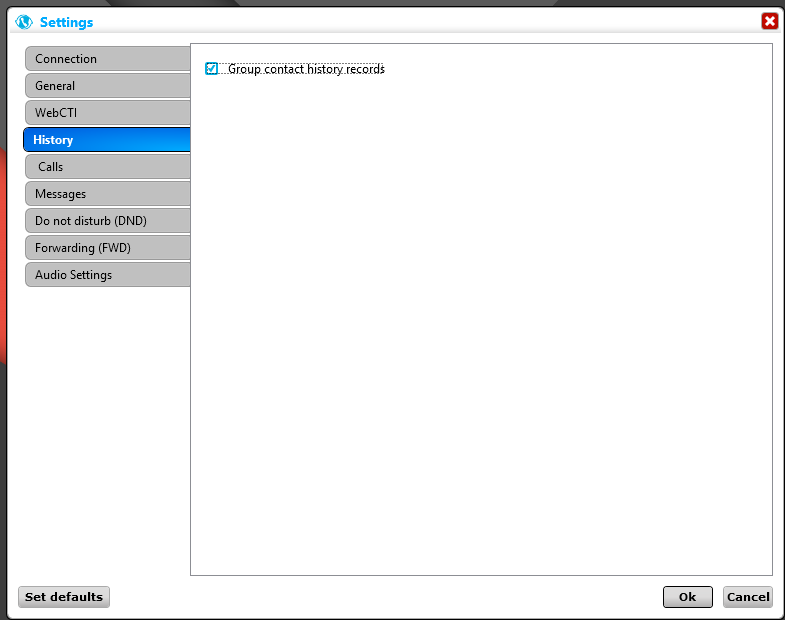
Application allows to group history records, for its organization. Missed and answered calls from one initiator will be shown as a one record with icon representing calls quantity.
Settings - Calls
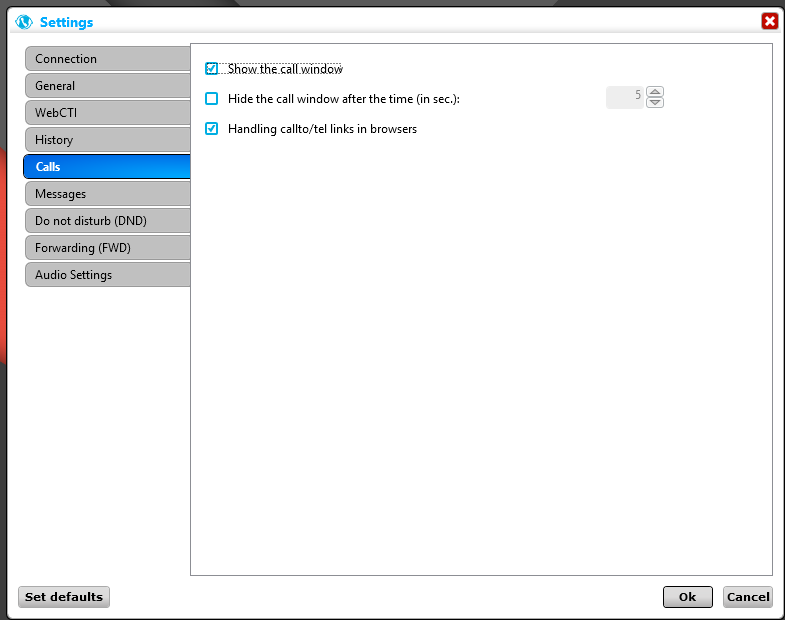
Show the call window:
- In case of incoming call or handset pickup, a additional window will appear, with call details.:
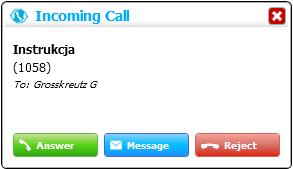
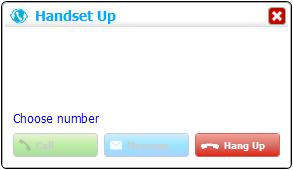
Hide the call window after the time:
- Call notification window will dissapear after time (in seconds) configured in this field.
Handling callto/tel links in browsers
- With browser addon (such as Telify), user can dial numbers with PhoneCTI.voip directly from browsers window.
Settings - Messages
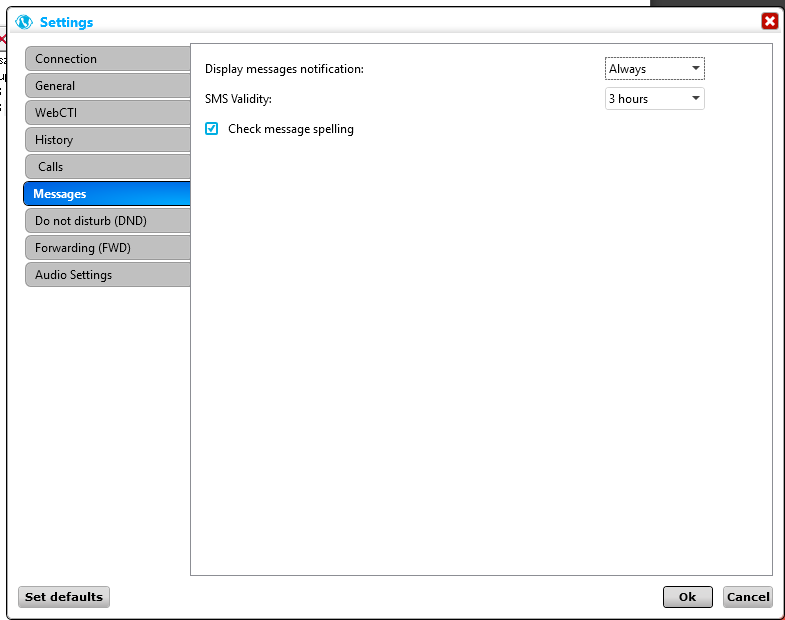
Selecting the option will result in different time of notifying about incoming SMS/chat message.
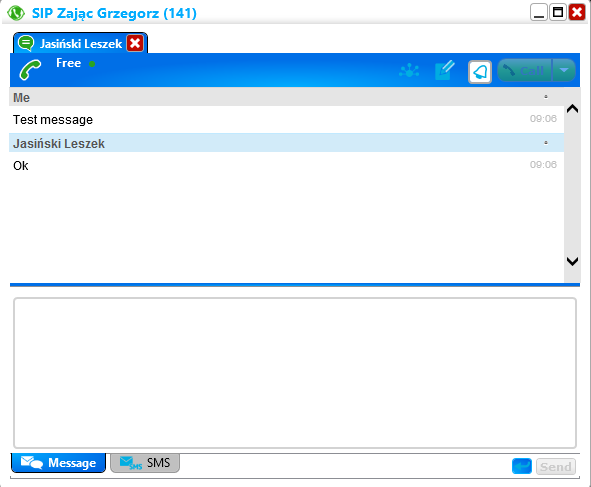
Above window will dissapear from Desktop, but tray icon will represent a message:
After clicking the envelope, message window will appear.
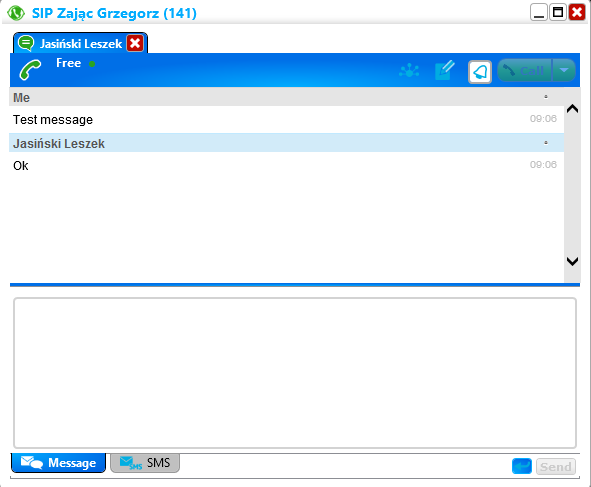
Message window has all sent and received messages from one user. Old messages are stored in archive.
Settings - Do not disturb (DND)
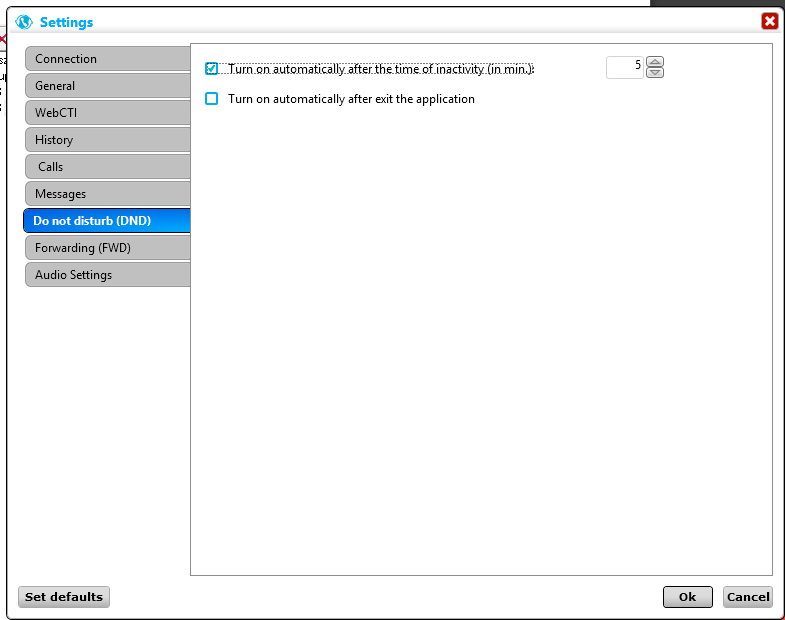
Screen determines rules of activating DND service. Do not disturb state can be turned on automatically after the time of inactivity on PC or phone (in minutes) or after application is turned off. DND can be turned on manually by pressing available DND button on main PhoneCTI.voipscreen.
Settings - Forwarding (FWD)
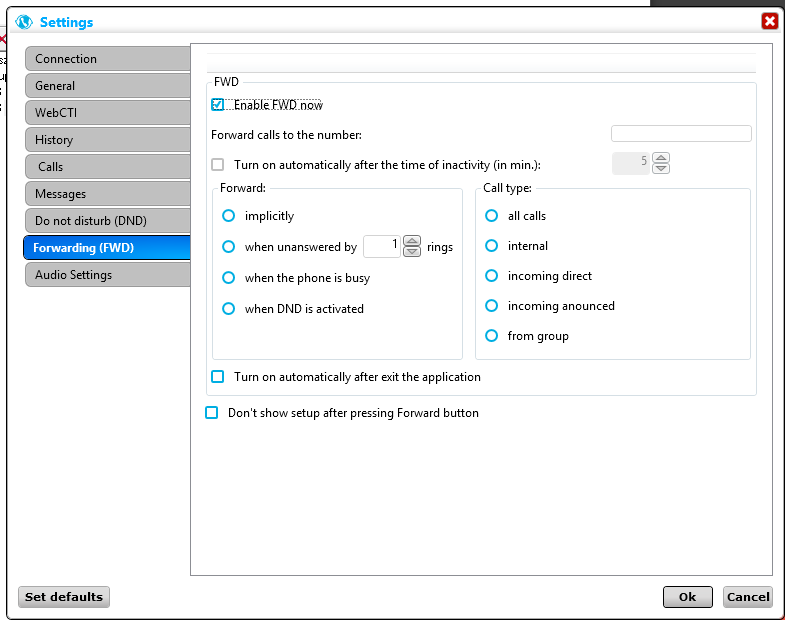
This window allow to set all options that regards forwarding calls to user's phone. The same settings can be changed in ConfigMAN application or by using services codes. Call forwarding can be turned on automatically after time of inactivity (in minutes). Inactivity time is a time where both user's phone and application are not used. Same as DND, FWD can be turned on automatically after application is closed. FWD button in main app screen can display the same settings window, or can turn on and off the service with last configured settings.
Settings - Audio Settings
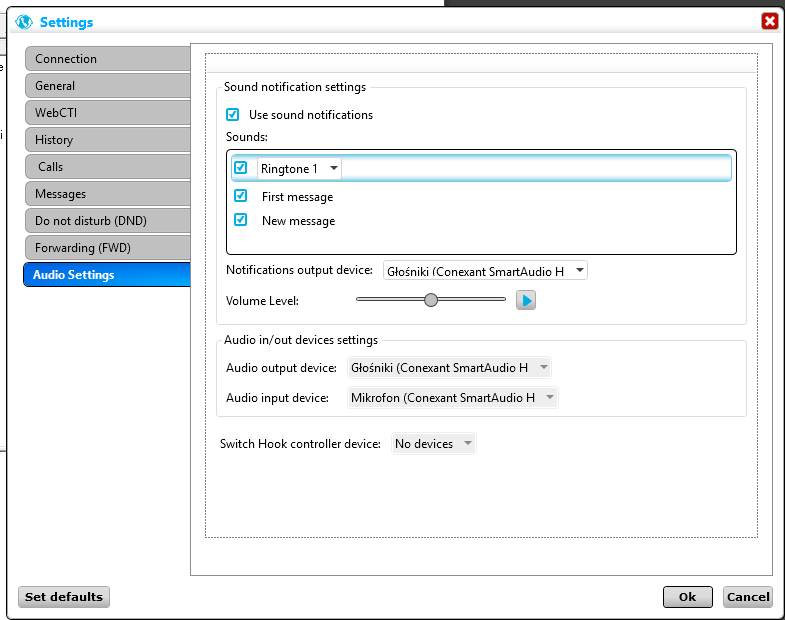
This window contain settings regarding acoustic signalling about incoming calls and audio input/output. When application user, uses headset for answering/making calls, proper device should be selected.
|
Call history
After clicking Last tab in the main application screen, user will see its own call history.
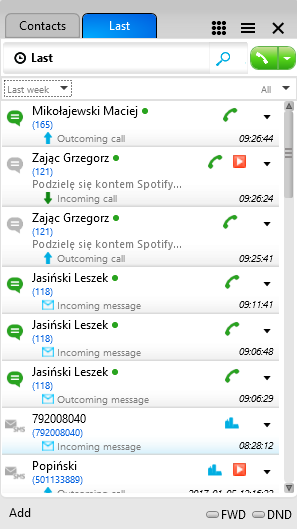
Each position in history window will represent one outgoing or incoming call. Call history is stored in PBX buffer. One record will have caller number, its commentary, date and call time. Next to each record, user will see icon, that represents the type of call:
Aswered incoming call.
Outgoing call (answered or not).
Missed incoming call.
Missed incoming calls icon. The number, represents the quantity of not answered calls from the same initiator.
Incoming call, answered by another PBX subscriber. Icon can appear in two situations:
- call was forwarded to a group, where user is a member, and call was answered by other group member
- other subscriber picked up'ed the call forwarded to user, by a special service code.
SMS message sent. Double clicking on the icon will dpop up the window with message text.
Chat messages with other application user. Double clicking on the icon will dpop up the window with message text.
Call was recorded.
Dialing and receiving calls
Call generating via PhoneCTI.voip application depends on PC and app configuration and used devices. When VoIP feature is turned on (Settings/Connection/VoIP settings/Use application in the VoIP mode) function buttons (answer, disconnect, hold, dial number) refers to built-in VoIP client. Call are carried out by PC's microphone and speaker or (as recommended) by wired or wireless headset (etc Bluetooth). When VoIP feature is turned off, it behaves as a normal PhoneCTI application, which is controlling phone paired with PhoneCTI. It is up to user to choose the best way for him, to use the application (with icons, shortcuts or context menu). Remember, that using the application with various types of phone is different. CTS system phones will be controlled by PhoneCTI (answering calls, disconnecting them, etc.), while analog or VoIP phones will only dial selected numbers, but handset needs to be picked up manually.
Choosing number from Contacts list
Searching of a contact:
- using expandable filter (Favorites, Recently used, All contacts, Internal numbers, Public, Private or Group name)
- using search window (magnifier icon) - full or part name or number of contact
- using scroll bar
Making a call for selected contact:
- double click on contact (required proper configuration in Settings)
- using handset icon (right from contact) and then acknowledge in pop-up window
- right-click on contact and choose Call
- clicking handset icon near search window, or choosing expandable menu and pressing Call
Choosing number from Last list
Searching of a contact in Last tab:
- time narrowing with date and time filters (last week, earlier month or all) and call type
- using search window
- using scroll bar
Making a call for selected contact:
- double click on contact (required proper configuration in Settings)
- using handset icon (right from contact) and then acknowledge in pop-up window
- right-click on contact and choose Call
- clicking handset icon near search window, or choosing expandable menu and pressing Call
Call transfer
During a call, PhoneCTI can transfer a call
- press Hold button in call window (requires app configuration)
- in main app window choose or type desired number and double-click it or press Call
With Transfer button user can easily transfer call with or without notification or return to earlier call if no one answered transfered call.
Call answering
Incoming call can be answered with Answer buton in call window or by picking up paired headset.
Call window
Example call window
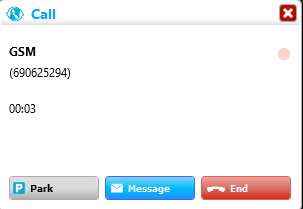
Middle part of window contains:
- Commentary of phone number
- Contacts phone number
- Call time, and before connection, dialing time
|
Message sending
PhoneCTI.voip allows to send and receive messages between application users. The same mechanism allows to send and receive SMS messages to/from mobile phone numbers.
Searching of a contact in Last tab or Contacts list:
- time narrowing with date and time filters (last week, earlier month or all) and call type
- using search window
- using scroll bar
Opening message window for selected contact:
- using handset icon (right from contact) and then acknowledge message button in pop-up window
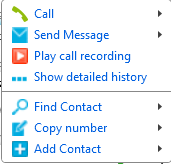
- right-click on contact and choose Send message or Send SMS
- clicking handset icon near search window, or choosing expandable menu and pressing Send message or Send SMS
Coosing message type:
- Message - for other PhoneCTI.voip users
- SMS - for mobile phone contacts
Example context menu
Message window
Incoming messages are presented in right lower corner of the screen (required app configuration 4.2.5 Settings/Messages)

Window will dissappear after few second, and tray icon will display incoming message
Pressing this icon will pop-up message window

This window contains also information about the person who send the message (number and comment, if added to phonebook) and message send time. Lower part of the window is a field, where user can respond to the message. In the upper part, a Call button is localized, for calling the message sender.
Chat
PhoneCI.voip aplpication allows for sending and receiving chat messagess between PBX and application users. All messagess are stored in list form and are accessible in Last tab.
SMS
Sending SMS messages is possible with GSM module installed in PBX. User requires proper priviledges, aquired from PBX administrator. Sended SMS message can have maximum 160 characters. More characters will divide sended message into two or more SMSes.
Changing code page for PBXes abroad If PBX is installed in country other than Poland, for using specified language characters in PhoneCTI.voip application, it is required to change handled code page. For doing so:
- PBX require minimum 6.50 firmware version
- PhoneCTI version should be at least 3.01
- PBX code page should be chaged with System command: PBX_CodePage <value>
value example:
WIN-1250
WIN-1251
...
WIN-1257
Conference
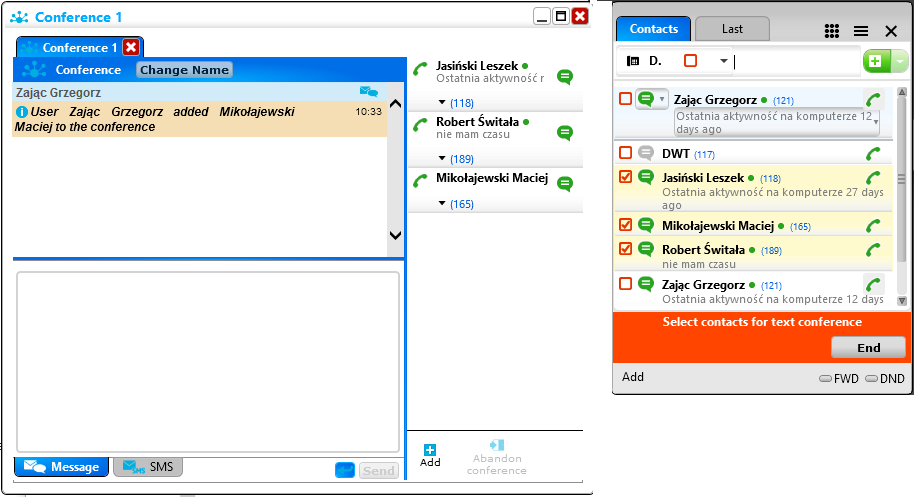
Text conference
PhoneCTI.voip application allows for text conference between app users.
Creating conference
1.
- choose contact from Contacts list
- press right mouse button and select Add to conference
- repeat above steps for other conference participants
2.
- choose contact from Contacts list
- press right mouse button and select Send message
- in message window press butoon Make conference
- choose conference participants from Contacts list.
